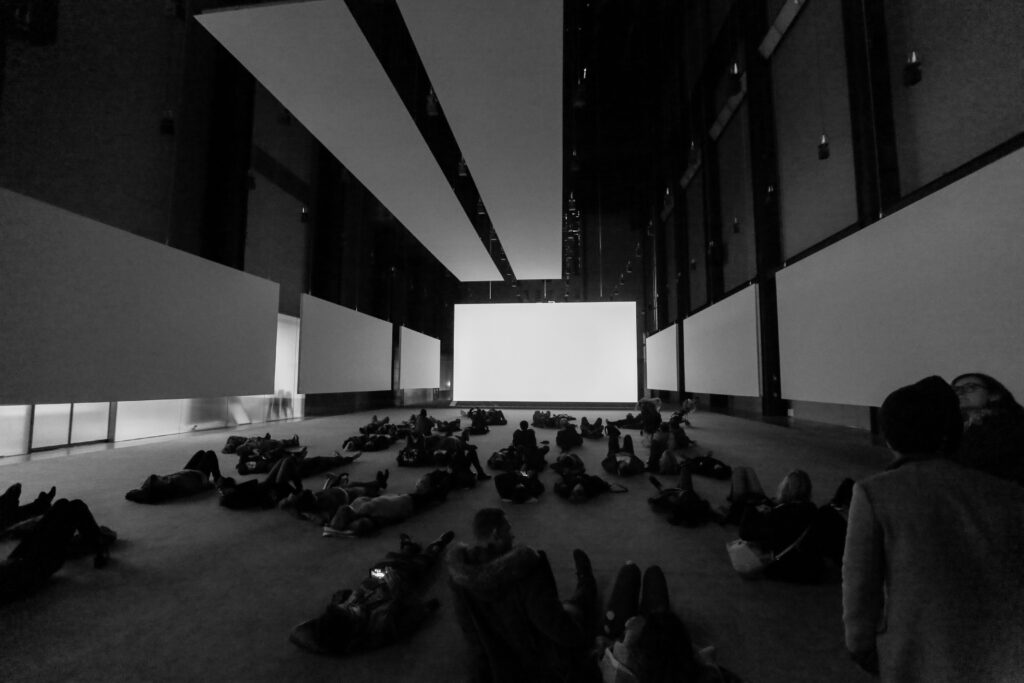
Classroom screen was a great idea especially as a lot of the people in our cohort will be TOC for a few years. It is a great way to individualize and personalize a space while we are working in it for a short amount of time. I love the feature that allows you to save white boards and go from one white board to another. It would be very handy to reuse different white boards for repeating lessons.
The other features that were very intriguing were the choosing a student tool. This would make it easy to make sure everyone has a chance to share or speak in class in a way that is fair. I also like that you can go in the back of the system and exclude students from getting chosen if you choose.
The other function I could see myself using quite a lot is the timer function. This is definitely a tool that I plan on using in the future.
It also is very practical as it allows you to write on the “white board” without having to turn your back on the class.
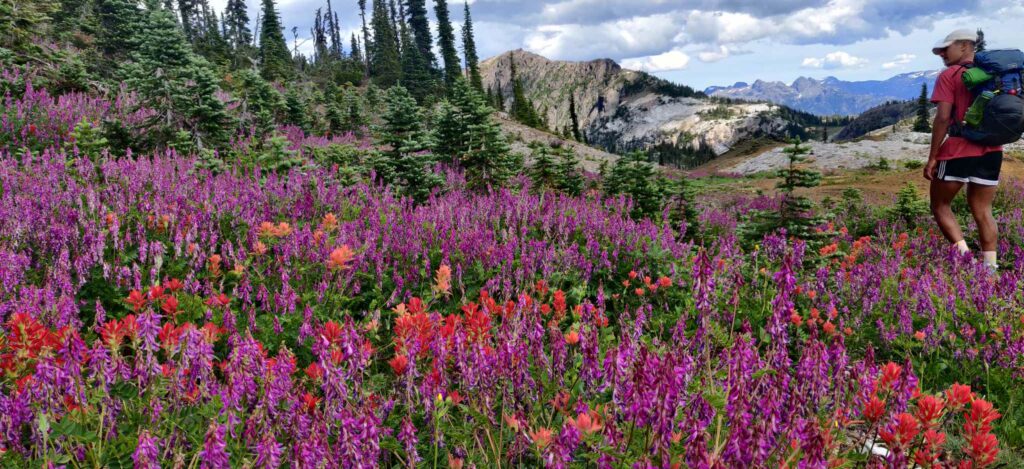
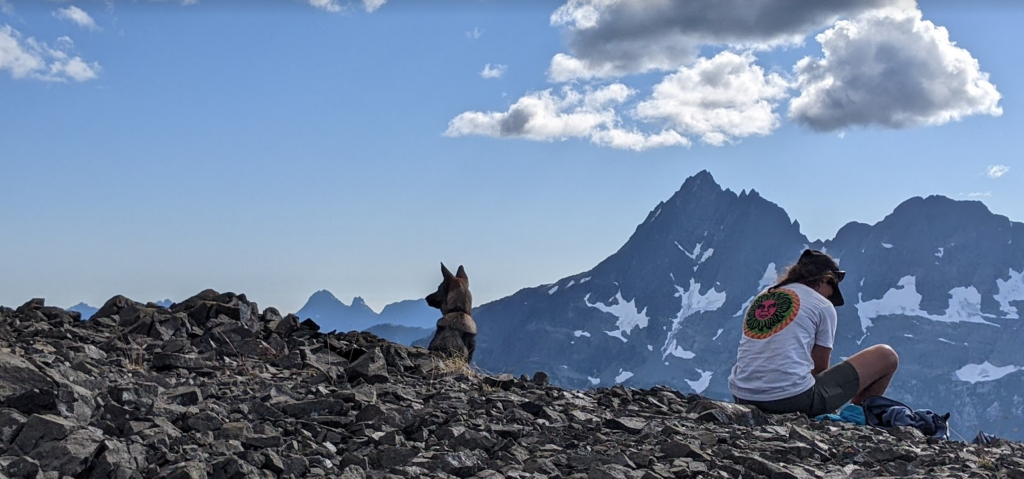
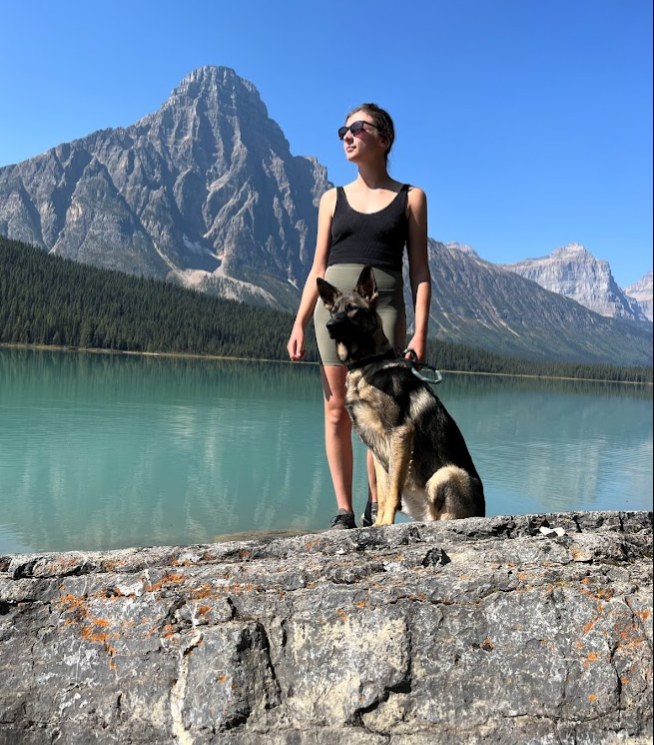
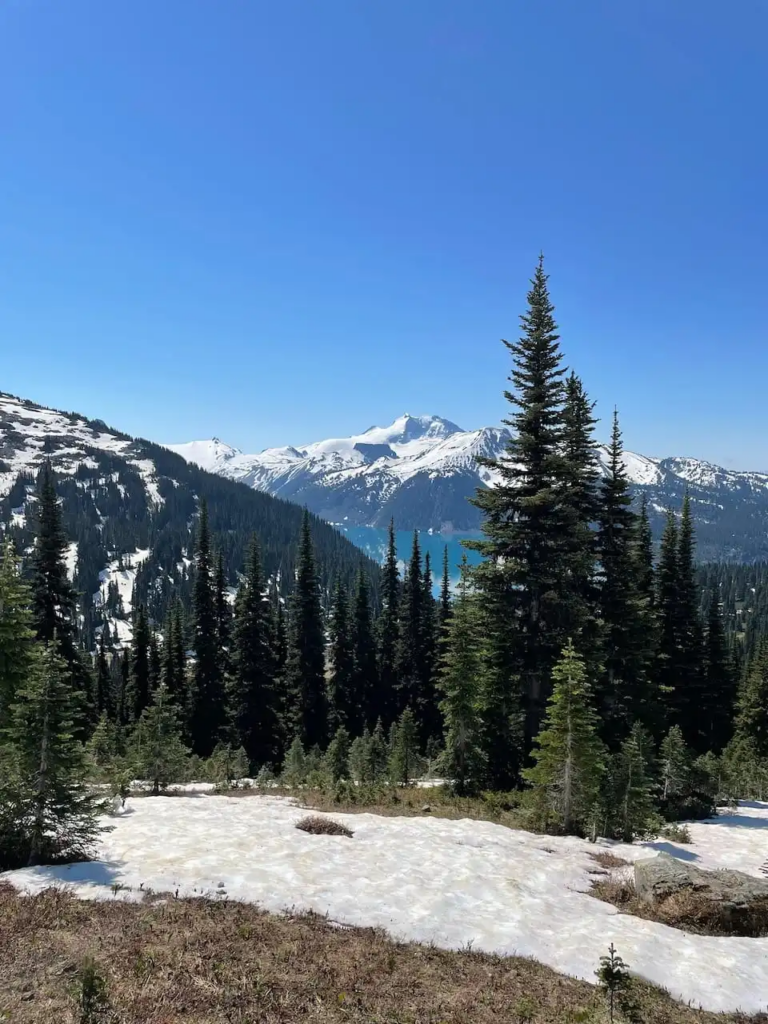
Three peaks in one weekend. This was Heidi’s first three day long hike and she was amazing. We arrived mid afternoon and canoed across Buttle lake to the Philips Creek camp ground. From there we hiked up to Marble Meadows and set up camp on the Friday night there. This was beautiful. Some of the most amazing alpine wild flowers I have ever seen and the moon was almost full.
The moon from our tent Theo in Marble Meadows
The first peak we summitted was Marble Peak. This was the hardest for Heidi as their were some scrambling sections. After this hike I went out a bought her a harness with a handle so I could help her more effectively on scrambling sections. This was in the summer so she is A LOT more confident now. We climbed done Mable Peak and carried on through the meadows and past an alpine emergency hut. We got up to the ridge and set up camp by a little lake. That night we went to the left of the ridge and to the top of Morrison Spire. The moon was full that night and the sky was clear. We had some fried dried mac and cheese and went to sleep.
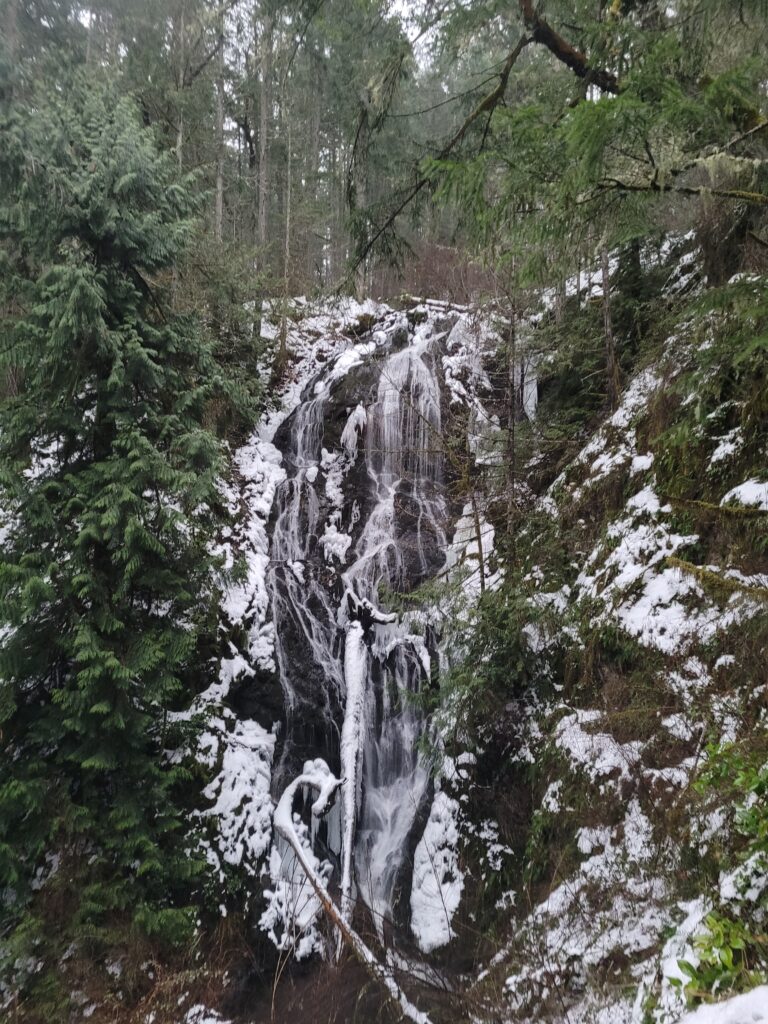
The view of the Golden Hinde from our tent
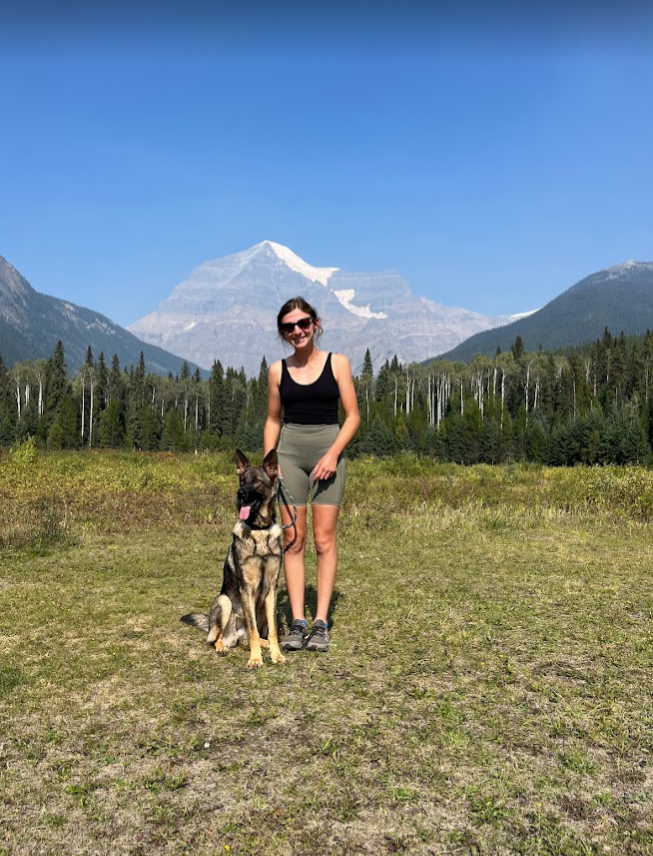
The next morning we woke up early and headed to the summit. we ran into some really experienced trail runners and one of them gave me some great hiking ideas and inspiration for future trips. He told us “leave no stone unturned” which we repeated for the rest of the hike. We made it to the top of Mount McBride around noon.
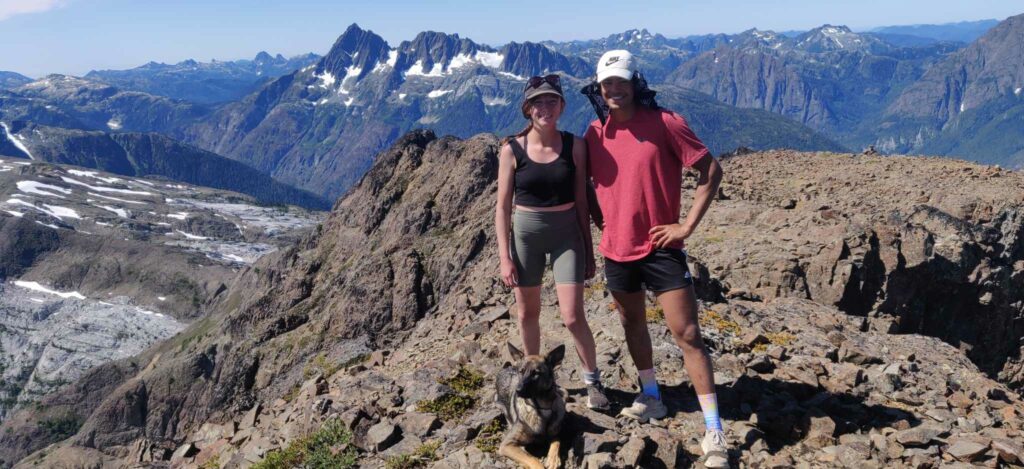
Sunset on the ridge We made it! Theo, Heidi and I at the top of Mount McBride
The next morning we woke up early and headed to the summit. we ran into some really experienced trail runners and one of them gave me some great hiking ideas and inspiration for future trips. He told us “leave no stone unturned” which we repeated for the rest of the hike. We made it to the top of Mount McBride around noon.
We made our way down. It was a long long hike out and canoe back to the car. We made it back at about nine as the sun was setting on the lake. It was such a pretty finish to the hike.
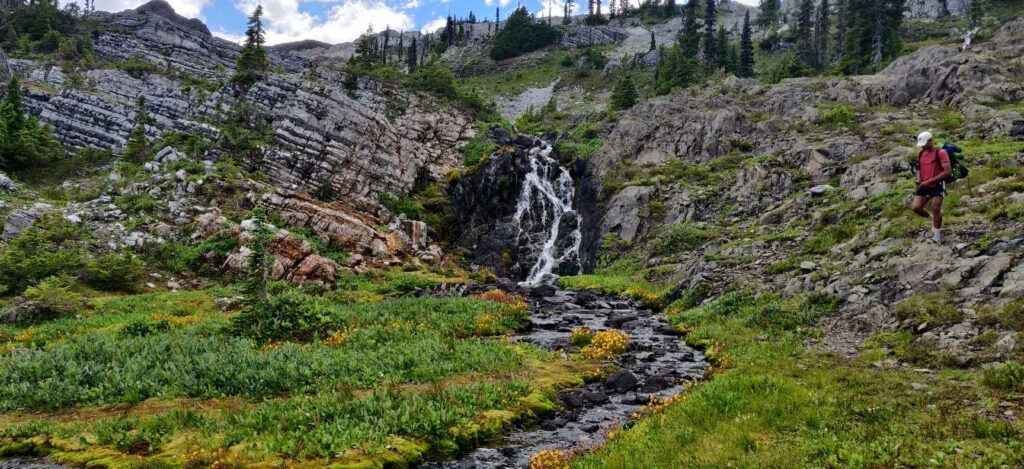
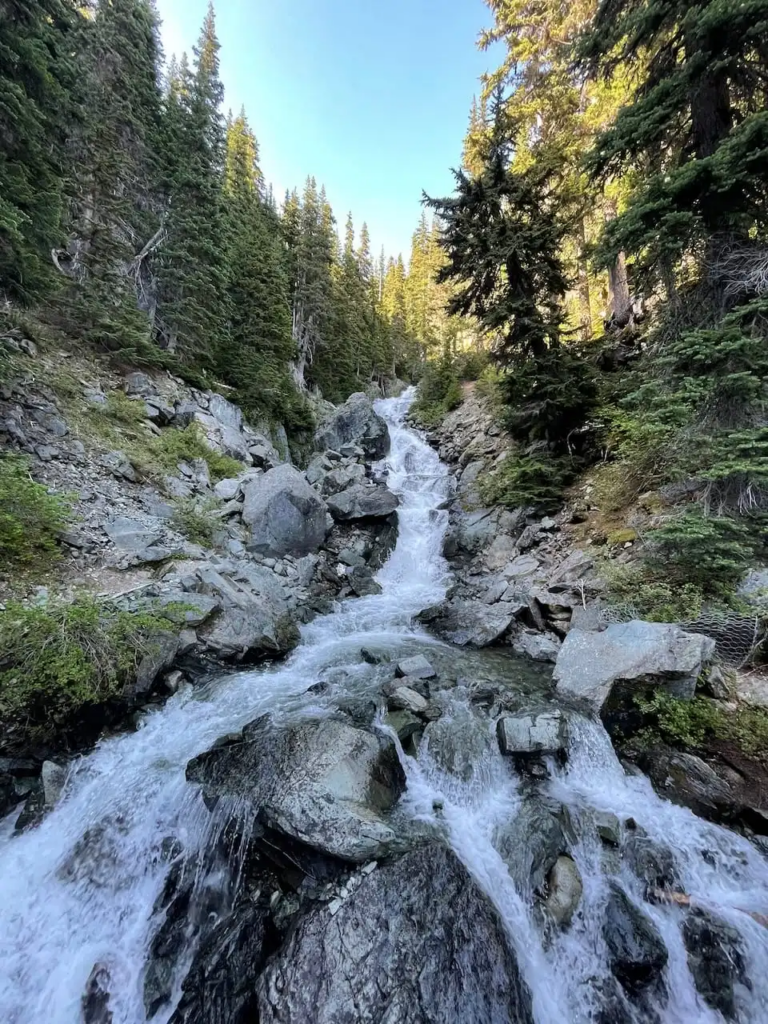
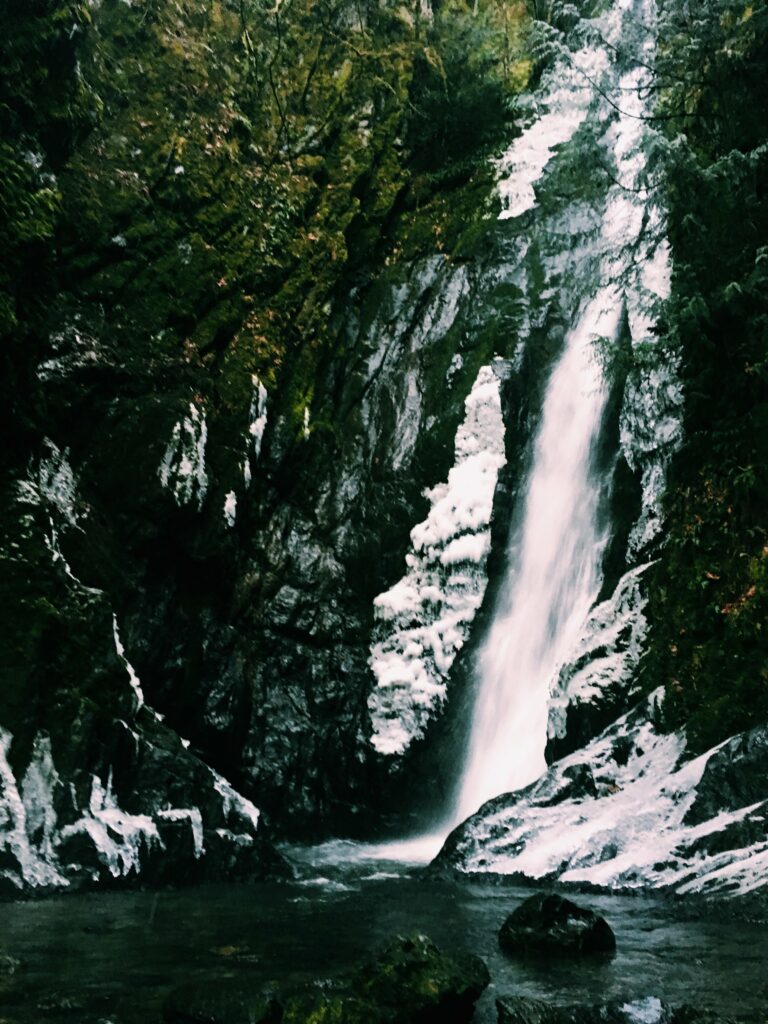
On the way down, we filled up our water bottles at this little waterfall
Step One: Choose a spot where you want to hang the tarp. Make sure it is not over low ground where water may puddle or pool. Look for a spot in between two secure and strong trees and branches to secure your rope to.
Paracord: More flexible, lightweight and multi purpose then rope.
Step Three: Tie the rope on one side using a figure 8 knot knot and tie the other side using a slip knot. Rope can be low to the ground at this point.
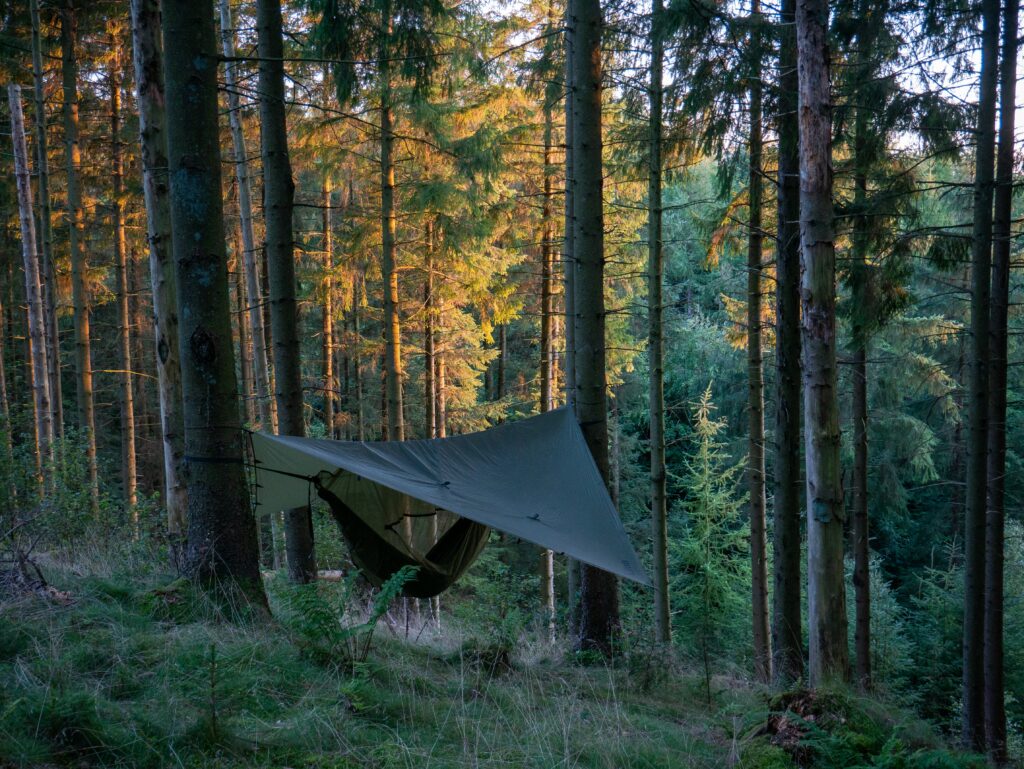
Step Four: Fold you tarp in half and lay the middle seem along the rope. This will make your tarp a triangle shape which is ideal because you do not want to it to lie flat otherwise water might puddle in the middle and weigh down your tarp!
Step Five: Take the Paracord and attached one end to the silver lined holes on the tarp and attach the other side to the rope.
Step Six: Tighten up the Slip knot until you tarp is as high as you would like.
Step Seven: Tie off the four corners of the tarp with left over paracord. Make sure that the corners are lower then your main rope.
This above example is good because water will run off of it and not puddle!
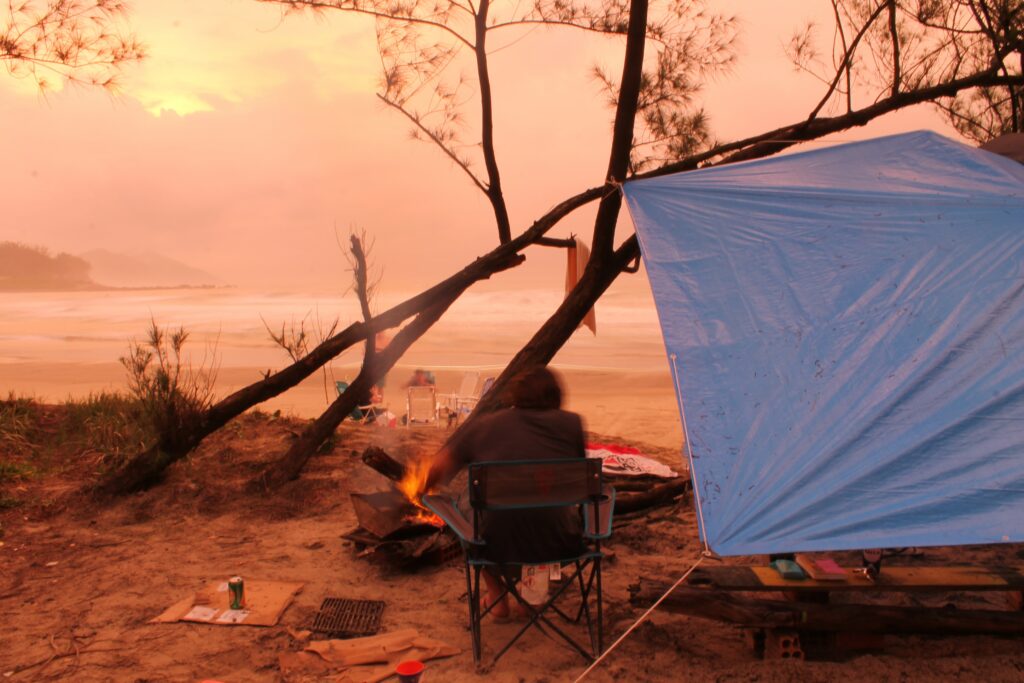
Use you tarp to keep bags dry or even set your tent up underneath it. If I had done this the first night of the Golden Hinde trip it might have been a different trip. You may need to tighten as needed on windy nights.
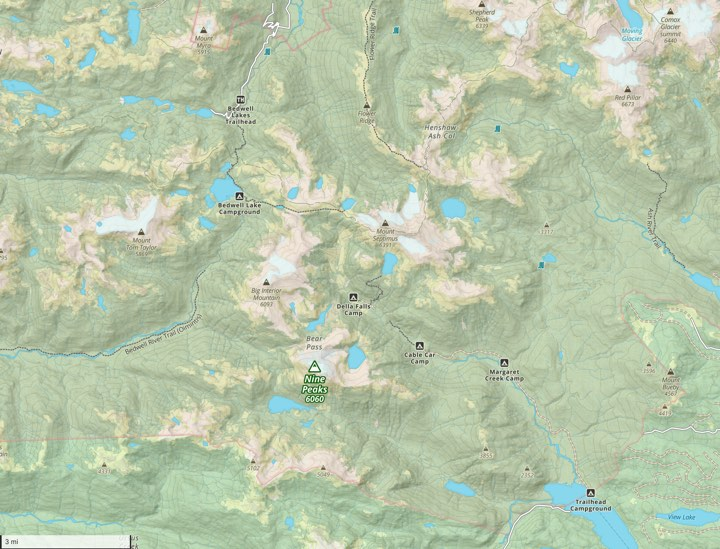
One hike I’m hoping to check off my list is Nine Peaks in Strathcona Park. Nine peaks is in the heart of the park so this will be a multi day backpacking adventure. While we wait for the weather to get better, I have put together a day plan for the trip drawing from past experiences in the area, and trip reports from countless other hikers. I’ll be expanding on this in the future with more information about the route, so we are well prepared for the adventure ahead!
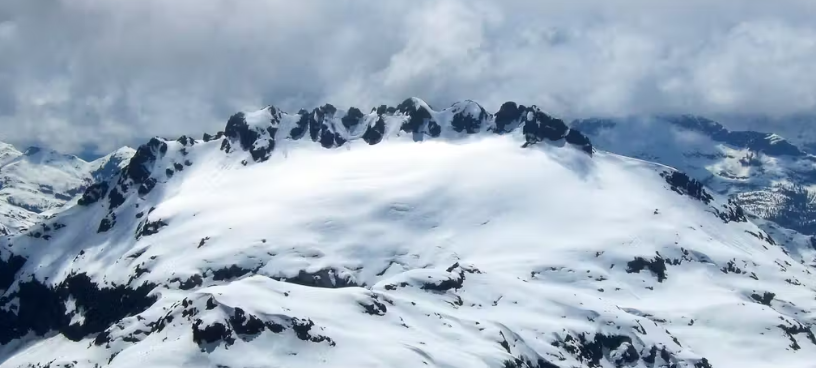
Nine peaks from a distance! Image from https://www.summitpost.org/nine-peaks-strathcona-park-vancouver-island/951800
The start of the plan is to drive up in the evening before day one and camp at the trailhead so we can get up early and rested for day one.
Day One: We will begin hiking from the Bedwell Lakes Trailhead and head up the trail, past Bedwell Lake toward Cream Lake. First night we plan to camp between Big Interior and Nine Peaks to make the second day easier on ourselves.
Day Two: From camp between Big Interior and Nine Peaks, the plan is to summit Nine Peaks before the day gets too warm, then slowly head back to camp pack up, and head to the next camp on the Bedwell lake side of Big Interior Mountain.
Day Three: The 3rd and final day is the easiest day on paper. From our camp below Big Interior Mountain, we should have plenty of time to head down to Bedwell Lakes, and back to the parking lot for the drive back home.
Around 12:45 we made it to the summit block of the Black Tusk. But we can, and will go higher.
After a quick snack and rehydration we set off around the only traversable side of the summit block. After about 200m we reached a selection of gullies. To find the right gully, a fellow climber gave us some advice:
“If it doesn’t look like something you want to climb, it is not the right gully”
We found this to be rather accurate as the rest of the gullies involved some overhanging rock, which is a bit more than we had bargained for. Luckily, the one remaining gully and the farthest one to the west was the one we were looking for.
Although many people didn’t wear helmets here, I think the consensus is that its probably best if you did. Metea narrowly missed being hit when we arrived at the gully from a climber above. Although most of the handholds are solid, the summit block is essentially a mountain of shale so be careful and make sure you are not sending rock down onto those below.
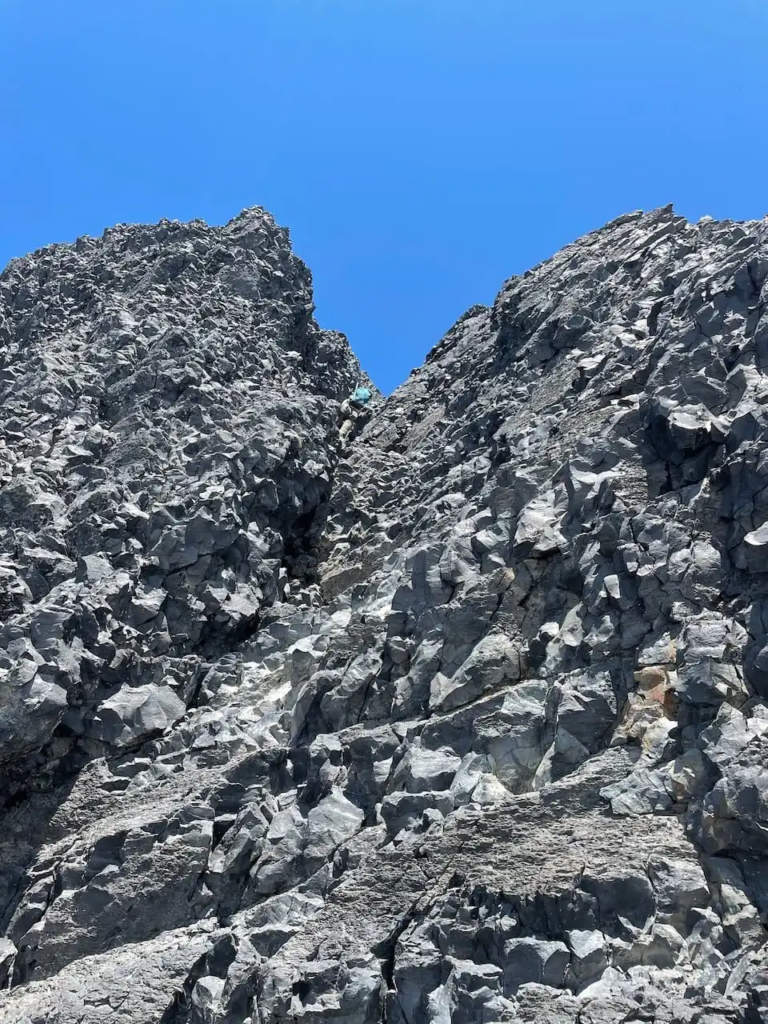
First and most difficult section of scramble
The first 5-10 meters of the gully is near vertical and is undoubtably the sketchiest part of the scramble. Luckily it is harder going up then it is to come down. Take it slow and be sure of your foot and hand placements.
After this first section, the gully starts to level out and narrow. When it’s uncomfortable, and before it drops off the other side, climb up and out the gully to continue the accent. The rest of the way is fairly straight forward, and before long we were at the top, puzzling as to why anyone would ever attempt getting to the actual summit.
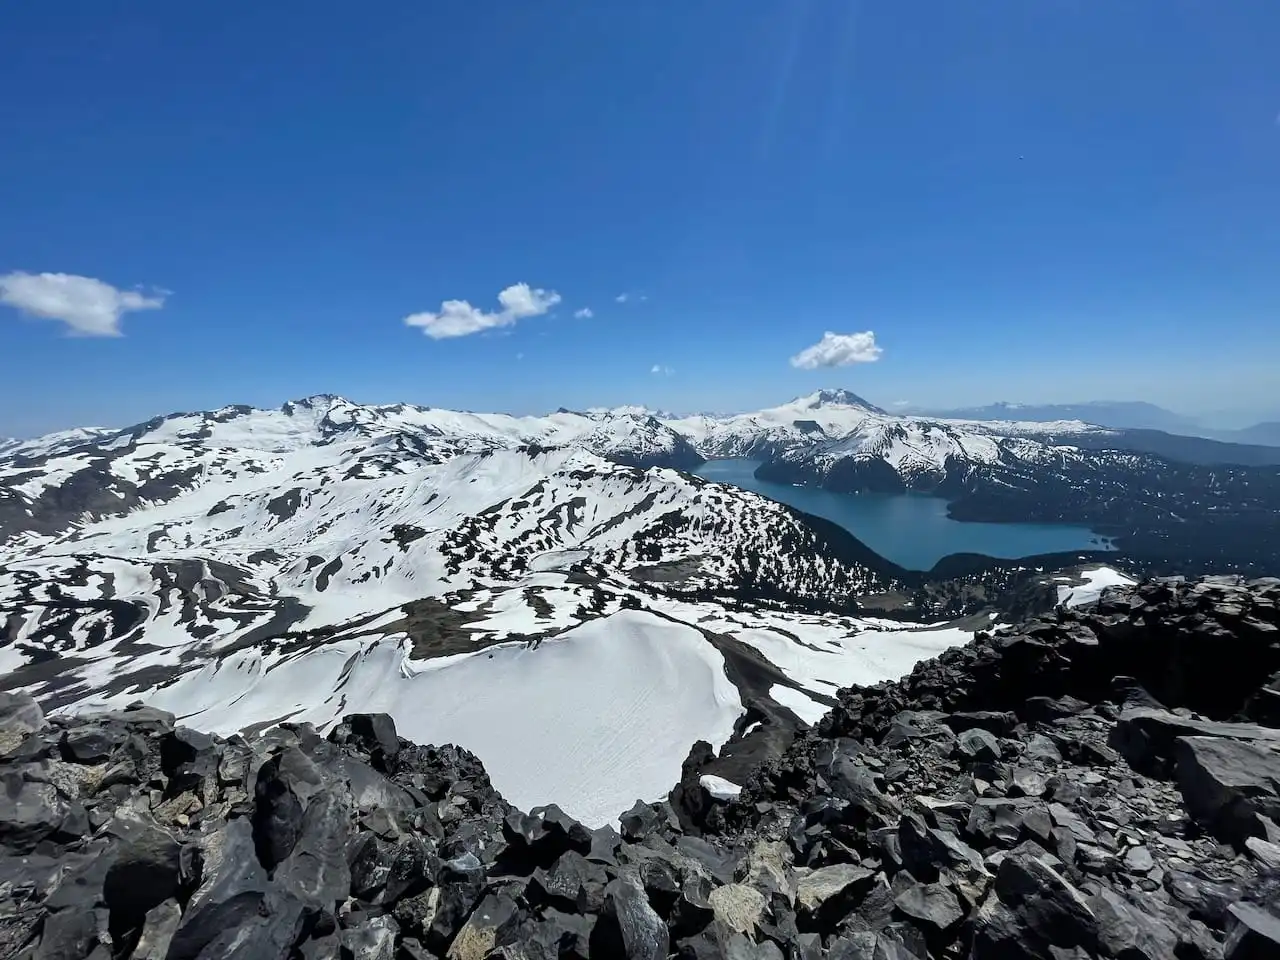
False summit views over Garibaldi
We started our descent a little before 2pm. We hit a bit of traffic with climbers coming up the gully but by 2:20pm we were off the summit and shortly after were butt-sliding our way down the snow.
The Mistake
We started our descent a little before 2pm. We hit a bit of traffic with climbers coming up the gully but by 2:20pm we were off the summit and shortly after were butt-sliding our way down the snow.
Every year Garibaldi lake collects pollen from the surrounding trees and some of it collects at the outflows, namely, the Rubble Creek outflow. This is also where all the trails meet the lake. Now I’ve heard this usually just leads to some unsightly froth where the pollen collects. However, in 2022, thanks to the sudden onslaught of high temperatures, it has turned into nothing short of a biohazard. The worst part, the smell. Not going to sugar coat it, it smelt like crap. Worse than the outhouses at the trailhead. So what was a dream of respite and rejuvenation turned into the most unpleasant alpine lake experience ever. Imagine further around the lake this would all be out of mind, but we did not want this to turn into more of a detour than it had already.
We swiftly left, and continued on back to the parking lot. The remaining 9km of this trip was long and painful. This being the first big hike of the year had finally caught up to both of us. We made it back to the car a bit after 7pm and promptly made our way to the closest A&W to drown our pain in burgers and root beer. All in all, a great day out.
Although we are capable of getting up at heinous hours, this trip did not feel worthy of such effort. 6am wake up, 6:30 out the door with Yerba-mate in hand. Barely earlier than the weekday grind. From My friends Burnaby apartment to the trailhead took approximately 1 hour and 15 minutes which got us on the trail just before 8am.
The first 6 kilometers of the hike consists of a gentle, but consistent, climb to gain you around 750 meters. This part of the trail is in great shape and the morning forest was cool, perfect conditions to power up the trail on fresh legs. After about 1:15 we made it to the junction to Taylor Meadows and Garibaldi Lake, we chose the former as it is the most direct route to our objective.
From the junction to Taylor Meadows Campground is roughly another 1km and 150m elevation taking us less than half an hour. Here we took our first break and replenished a water bottle from a nearby stream, using a treatment tablet to kill off anything that would ruin our day out.
Unfortunately, this is where the bugs found us, and so shortly before 10 we were back on the trail, barreling through Taylor Meadows towards the Black Tusk.
Metea taking an opportunity to cool off
The Grind Begins
The trail through Taylor Meadows is relatively level compared to the previous 8km but on a hot day the sun is oppressive, we were getting cooked. Thankfully the views are lovely and the going is quick so it didn’t feel like long before we were at the junction to the Black Tusk and Panorama Ridge.
View of Garibaldi Lake, The Table, and Mt. Garibaldi
Up until the junction we had not encountered much snow at all, an unfortunate outcome for the couple who we passed carrying skis on the way up, but for us meant we could keep a swift pace.
Seemingly instantaneously after the turn-off however, we were met with slushy mess we had been dreading. From the junction at around 1650m, we made the slow and draining climb through the snow towards the Black Tusk. The remaining 600 metres of elevation to the Black Tusk took us the same amount of time as the last 1000.
As our previous planned trip to Chilliwack called for a bit more intense snow gear, we had actually brought with us crampons, ice-axes, and helmets. As it was already taking us a lifetime to climb this steep snow pack, we thought, might as-well take longer by taking our gear for a spin. Needless to say, we looked ridiculously over-prepared and it earned us a few comments from fellow hikers.
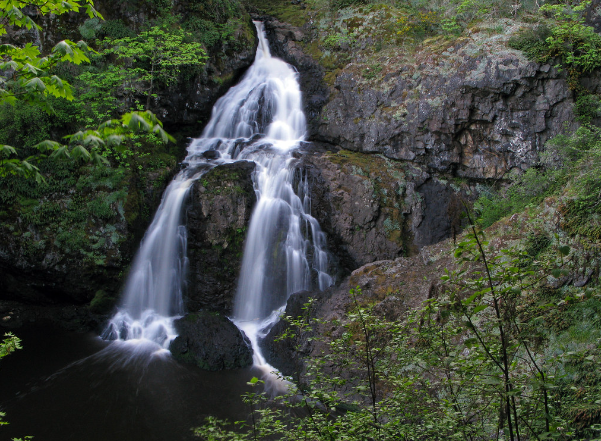
Sitting Lady Falls, Witty’s Lagoon Regional Park, Metchosin
This waterfall’s name was given to it because some fanciful person decided that when you at the falls, you can see the image of –you guessed it – a sitting lady. But this waterfall, to me is more like a mermaid’s lagoon, as Bilston Creek plunges down a rock face to fall into the salt water of Witty’s Lagoon. There are viewing platforms around the edge of the canyon to give different views of the falls.
At the falls, the trail branches in two directions. Go to the branch on the left, and you will hike the point of rock on the opposite side of the lagoon. The Ka-Kyaakan band the Coast Salish people lived in this area. Shell middens, a village site at the edge of the lagoon, and several defensive structures designed to protect its entrance are among the 27 identified areas of archaeological significance in the park. It is also a sensitive ecological area, containing rare and endangered native plants. Visitors are asked to stay on trails to protect these delicate and vulnerable sites.
Sitting Lady Falls
McKenzie Bight, Gowlland-Tod Provincial Park
The trail the goes to the right at the top of the falls leads round the other side of the lagoon and down to a salt flat. This trail can be very muddy, and appropriate footwear is needed. This area is known for birdwatching. The trial ends on the sand beach that forms a part of the sand spit that forms the lagoon.
Cascade Falls in the snow
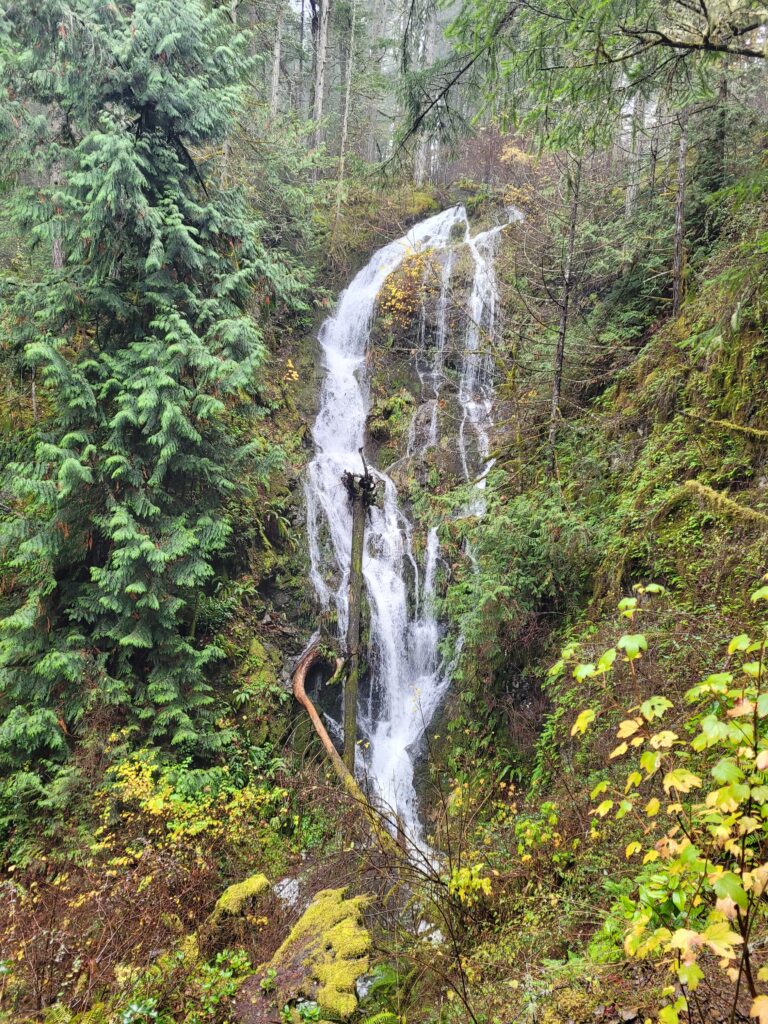
My third choice for favorite waterfalls in Victoria is the cascade of Pease Creek down the side of the sheer face between Ross-Durrance Road and salt water of McKenzie Bight. A friend of mine who is a professional photographer describes this as the most photogenic falls in the area, with portions of misty tendrils of water over rock contrasted with areas of plunging torrents.
Many hikes and camping trips are best in the summer months of warm, dry weather. However, in Victoria with its temperate climate and lack of snow, hiking is a year-round activity, and some of its attractions are at their best in the wet months of fall and winter. This is especially true of the many waterfalls in the area. There a many of posts that tell you about the waterfalls to visit during the summer– but this is likely to be disappointing as many of the creeks are reduced to a small trickle in the summer months. The waterfalls of this area are at their most spectacular when fall rains swell the volumes of water in their cascades. Falls which dwindle to a mere dribble in August are raging torrents in November.
So, as winter approaches in Victoria, it’s time to find a waterproof jacket and a pair of water-resistant boots with good tread and strike out to discover the beauty of the local waterfalls.
One of the best-known waterfalls in the area is surprisingly private and unvisited, largely because it is on the side of Highway 1 right at the beginning of the Malahat drive, and entering the small pullout parking area is complicated, if not downright dangerous. Getting to the waterfall from Victoria involves driving through Goldstream Park and continuing seven kilometers north to where a U-turn route allows you to change direction and come back south to the parking pullout. This maneuver is not for the faint of heart. The traffic is heavy and fast moving, and the pull-out is small, unmarked and close to one of the most accident-prone stretches of the highway – locally know as Dead Man’s Curve.
However, once you have parked, the rest is easy. A wide trail follows Niagara Creek through a steep canyon for about 250 meters to the waterfall. How close you can get depends on the volume of water in the creek. In the summer, when the creek bed is dry, it’s possible to walk right up to the plunge pool, but in fall and winter, we trade access to the falls for the sight of the volume of water that drops nearly fifty meters down the canyon wall.
After visiting the bottom of the falls and returning to the parking area, you can cross the bridge that spans the creek (stay well over to the side and watch the cars on the highway!). On this side you can access the trial that leads up the canyon to the top of the falls. The trial is steep and requires some scrambling. The trail crosses the bridge over the creek above the falls, and if you want to keep climbing, the trail comes out at the old Goldstream trestle of the E&N Railway. The railway is no longer in use and the bridge is decommissioned and considered hazardous to cross, but it’s still an amazing sight.
Day 2 We slept that first night at Arnica Lake, and when the day came, we came out to make our breakfast and began to talk to the other people who had stayed there that night. They were laughing at our arrival time, saying, “Oh, you guys got in late last night.” We didn’t want to admit that we’d made a bad choice. We didn’t want them thinking that we were total idiots – that we’d been hiking in the dark, setting up in the rain and that much of our gear was now wet– so we laughed it off and said that that was the way we’d planned it.
We started out, planning to make the hike to Carter Lake. But when we got there, we were dismayed to find that the path led between the cliff face and the lake. It consisted of jumping from boulder to boulder along the narrow way. And jumping with a forty-pound pack on is difficult. If you fell off the rock (which my sister did) you scraped your skin on the way down and landed either in the rocks or in the lake. On the other side of the lake, the trail led into the trees, and became difficult to follow. We made a few wrong turns, lost the trail, and ended up bush-whacking our way back down to the lake to pick up the trail again. The rain continued, and while we were optimistic at first that the fog would lift, it never did.
Best View of the Trip
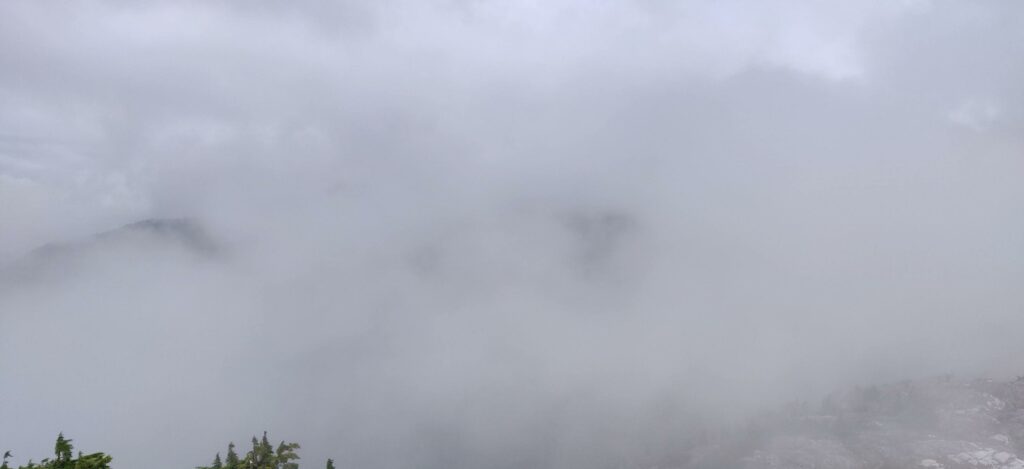
We were cold, wet and tired when we met three guys coming down off the mountain. We noticed right away that they didn’t look happy. They trudged along in absolute silence. We asked them about their trip, and they said that it was a bust. They hadn’t summitted because the mountain was in fog and the trail so hard to see that there was a risk of falling off the ridges you need to navigate to the top. They had waited in the base camp for three days, trying for a break in the weather, but they were done. They had no food left and everything they had was wet. As we watched them go down the path, we had a quick conversation, trying to decide if we should give up and follow them. But that sounded a lot like quitting and so we went on to the base camp.
We covered the entire distance in a single day – a trial that some guide books recommend two or three days to cover – and made it to the base camp. That was one of them most uncomfortable nights I have ever spent in my life. We were wet and cold. We committed the camping no-no of cooking inside our tent. We thought the stove might generate some heat and dry our stuff out a bit. It didn’t. I went 20 meters from our tent to the edge of Burman Lake to fill our water bottles. When I turned around, I couldn’t see our camp through the fog. I went back to the tent and had a talk with my sister. We agreed. This absolutely sucks.
The next day we woke up and the fog was even worse. We had to check on Alltrails every 100 meters or so to make sure we were on the right trail. We were supposed to submit but there was no way to see what you were committing to climbing up. In the we decided the visibility was way to bad and that it would dangerous to attempt summiting. The risk of getting cliffed out was too high.
The wonderful views
We decided that we weren’t spending another night out. We were hiking out in one day. We started walking at about 7 am, and got back to the car at 8 pm. We didn’t stop for lunch or blisters. We hiked back down Burman Ridge, through the valley, then back up Philips Ridge and back to the camp where we had spent the first night at Arcana Lake.
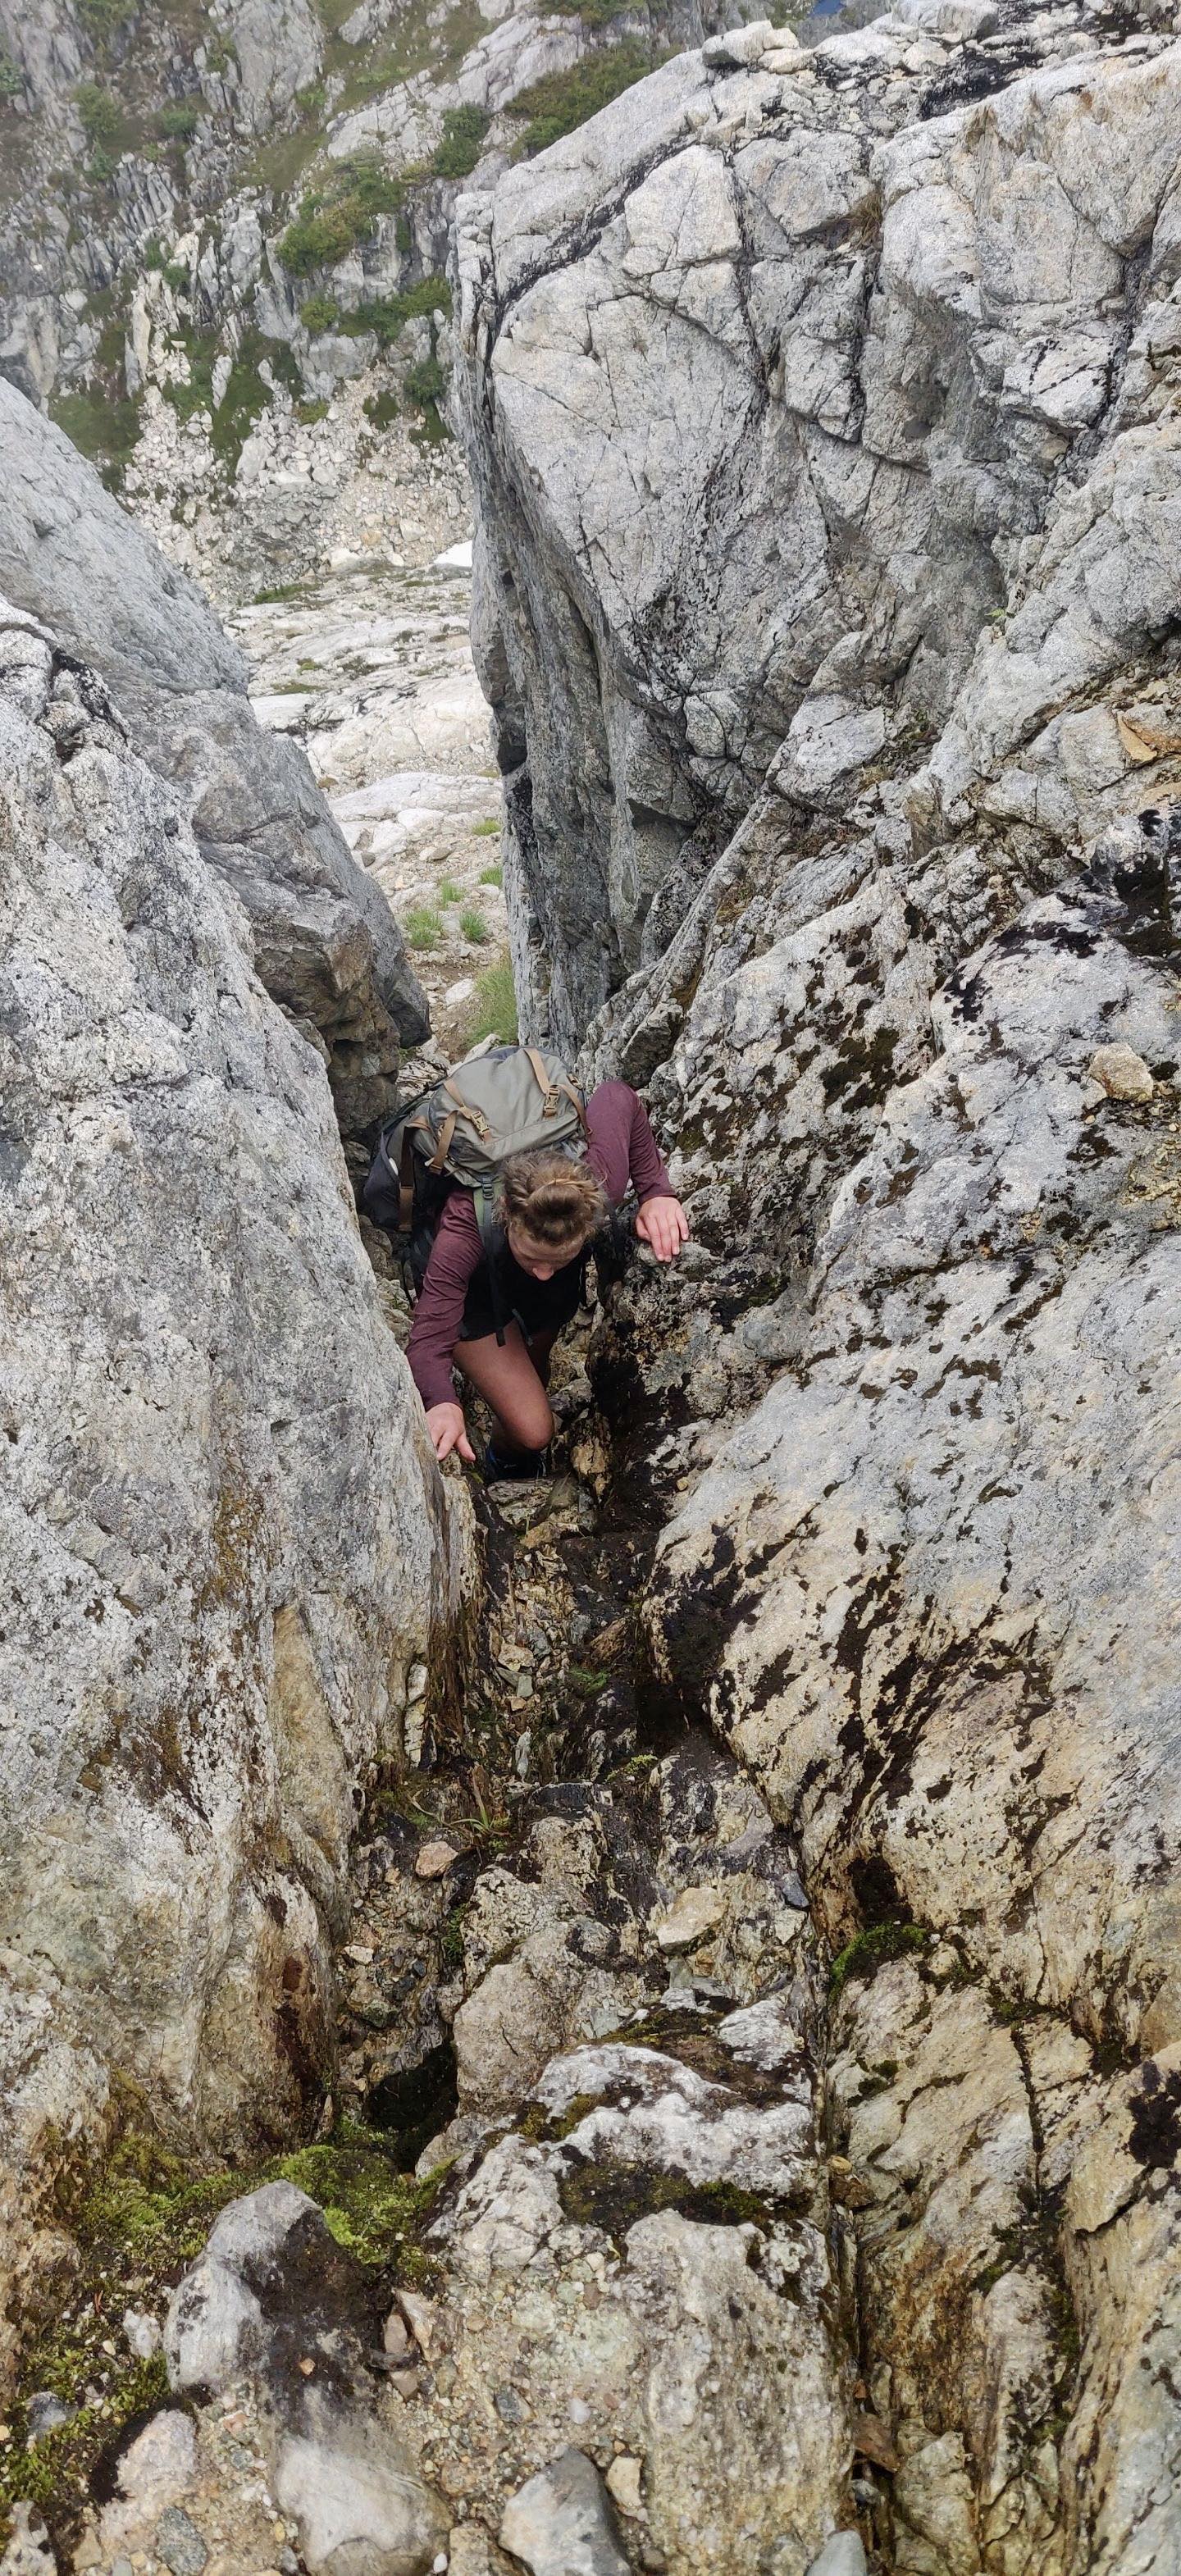
Up the chimney on Philips Ridge
Along the way we met a couple walking in. They had a corgi with them. They stopped to talk and wanted to know whether their dog was going to be able to make the hike. I was trying to be positive, saying that he would probably need to be helped over some of the difficult parts of the trail. I was going to talk about the boulders by Carter Lake, but my sister walked past them. My sister didn’t even stop, but as she passed, she said, “Absolutely not.” We got back to our car and started to drive back home. We thought we’d stop by the A&W in Campbell River for dinner. When we got there, we were so stiff we couldn’t even get out of the car and had to go through the drive thru.
So what do we learn from these hikes where, in spite of planning, good packing and experience, things go terribly wrong. Well, it’s character building. You get to look back and say that – as awful as it was – you survived it. Then there is the power of a shared experience. Sometimes, it isn’t the trips that go well that end up being the ones you remember. I can imagine my sister and I – years from now – sitting at the dinner table somewhere and laughing,
“Do you remember that trip we took to the Golden Hinde?”